Learn how to enable the Wix cookie banner to ensure your website meets GDPR and CCPA requirements. Follow this step-by-step guide for easy compliance.
Running a website today means taking data privacy seriously. If your site uses any form of tracking or analytics, you almost certainly need a cookie banner to inform visitors about how their data is used. Fortunately, enabling the Wix cookie banner is a quick process that helps you stay compliant with laws like GDPR, the ePrivacy Directive, and CCPA.
This guide walks you through every step shown in the tutorial — from exiting the editor to seeing the banner live on your site.
Disclaimer: The steps below are for educational purposes only and come without any warranty. Always consult a legal professional to ensure your site meets the specific data protection regulations in your jurisdiction.
Why a Cookie Banner Matters
A cookie banner informs visitors about the tracking technologies active on your site and gives them a choice about whether to accept or decline those cookies. Without one, you risk non-compliance with privacy laws that apply in the European Union (GDPR, ePrivacy Directive) and in California (CCPA), among other jurisdictions.
The banner does not replace a proper privacy policy — it works alongside one. For a broader look at what Wix offers as a platform, see the Wix Review 2026: Is It Still the Best Website Builder?.
Step 1 – Exit the Wix Editor
The cookie banner settings are not found inside the site editor itself. You need to return to your main Wix dashboard first.
- While in the Wix editor, click Exit Editor in the top corner of the screen.
- You will land back on your Wix dashboard.
This is an easy step to overlook — the privacy settings are a site-wide configuration, not a design element placed inside the editor canvas.
Step 2 – Navigate to Privacy and Cookies
- From your dashboard, click Settings in the left-hand menu.
- Select Privacy and Cookies from the list of options.
This section contains all the controls you need to display and configure your cookie consent banner.
Step 3 – Enable the Cookie Banner
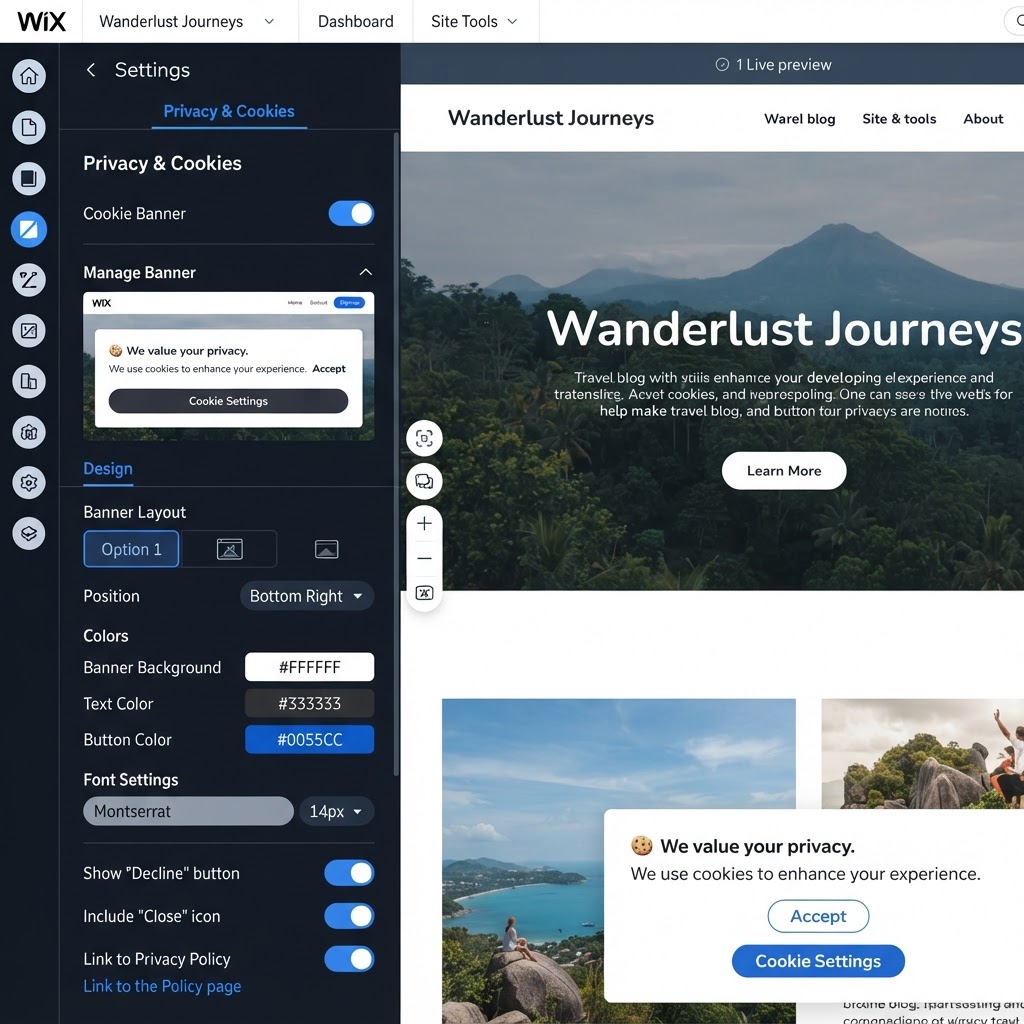
Once inside Privacy and Cookies, you will see a toggle labelled Display Cookie Banner on Site. Switch it on. This is the master switch that activates the banner for every first-time visitor to your site.
Step 4 – Choose a Theme
Wix gives you two visual options for the banner:
- Light theme — a pale background, suitable for darker site designs.
- Dark theme — a darker background, suitable for lighter site designs.
Choose whichever fits your site's look. The default button text reads "Accept," and visitors will see this at the bottom of your page on their first visit.

Step 5 – Configure the Banner Settings
Opening the settings panel reveals several options worth enabling. Below is what the tutorial demonstrates and what each option does.
| Option | What It Does |
|---|---|
| Display Cookie Banner | Master toggle to show or hide the banner |
| Light / Dark Theme | Visual style for the banner |
| Decline All Button | Lets visitors reject non-essential cookies immediately |
| Cookie Settings Widget | Lets visitors choose which cookie categories to accept |
| Privacy Policy Link | Links your policy so visitors can read full disclosure |
Add a Decline All Button
Adding a Decline All button is strongly recommended. It allows users who do not want cookies placed in their browser to opt out in a single click, which is a requirement under GDPR for meaningful consent.
Add the Cookie Settings Widget
The Cookie Settings Widget gives visitors granular control over the specific types of cookies they accept while they browse your site. This is a more transparent approach and is considered good practice under modern privacy frameworks.
Review and Edit the Banner Text
Wix provides standard boilerplate text that reads along the lines of: "We use cookies on our website to see how you interact with it. By accepting, you agree to our use of such cookies." You can edit this text directly. As the tutorial notes, you may want to work with a lawyer to tailor the wording to your jurisdiction's specific requirements.
Link Your Privacy Policy
Always connect your existing privacy policy to the banner. Wix allows you to link it directly within the settings panel so that visitors can click through to read your full data disclosure before making a decision.
Step 6 – Save, Publish, and Verify
- Check the box confirming you have read and understood the settings.
- Click Save and Publish.
- Navigate to your live site as a new visitor.
You will see the cookie banner appear at the bottom of the page. The privacy policy link is visible, visitors can open the settings to choose their cookie preferences, and they can either decline all or accept. Once a visitor clicks Accept, the banner disappears for that user — they will not see it again on return visits because their consent has already been recorded.
What Happens After a User Accepts?
As demonstrated in the tutorial: once a user clicks "Accept Cookies," the banner is dismissed and will not reappear for that user. This is standard consent behaviour — the choice is stored so that repeat visitors are not interrupted on every session.
If you are comparing Wix against other website-building platforms for your project, the Base44 vs Wix: Which AI Website Builder Should You Choose? article covers the key trade-offs in detail.
Recommendation
Enabling the Wix cookie banner is a quick but genuinely important step for any website owner. The process takes only a few minutes: exit the editor, open Privacy and Cookies in your dashboard, toggle the banner on, add a Decline All button and the Cookie Settings Widget, link your privacy policy, and publish. That covers the technical side.
The legal side is your responsibility — use Wix's tools as a foundation, but have a legal professional review your banner text and overall compliance posture, especially if you have visitors from the EU or California.
If you have not yet built your site, try Wix for free to get started with a platform that makes compliance straightforward from day one.
● FAQ